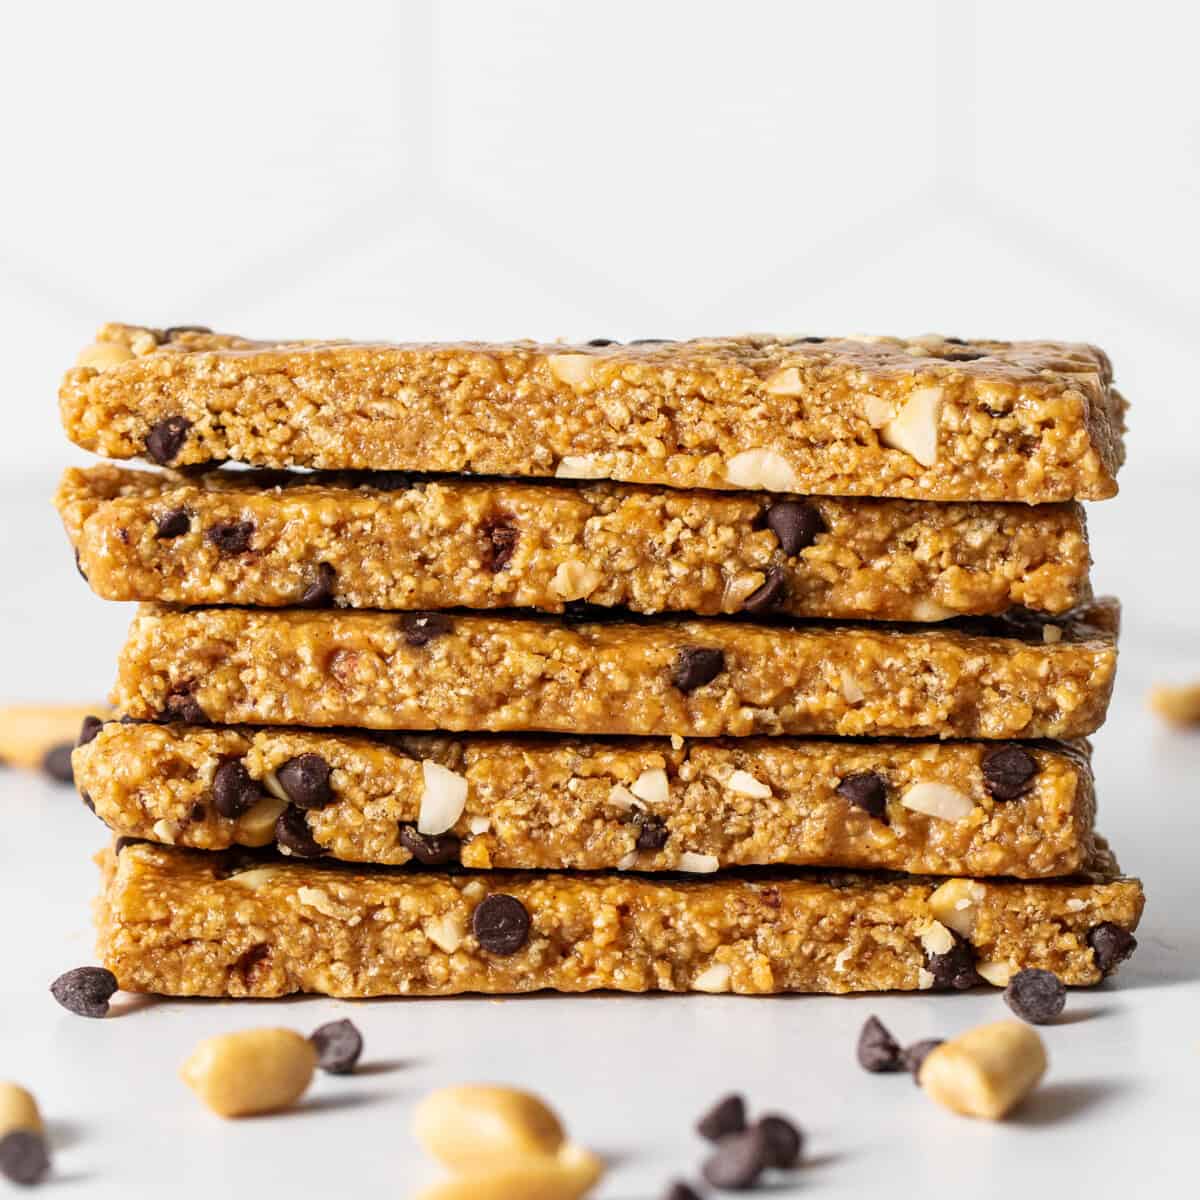
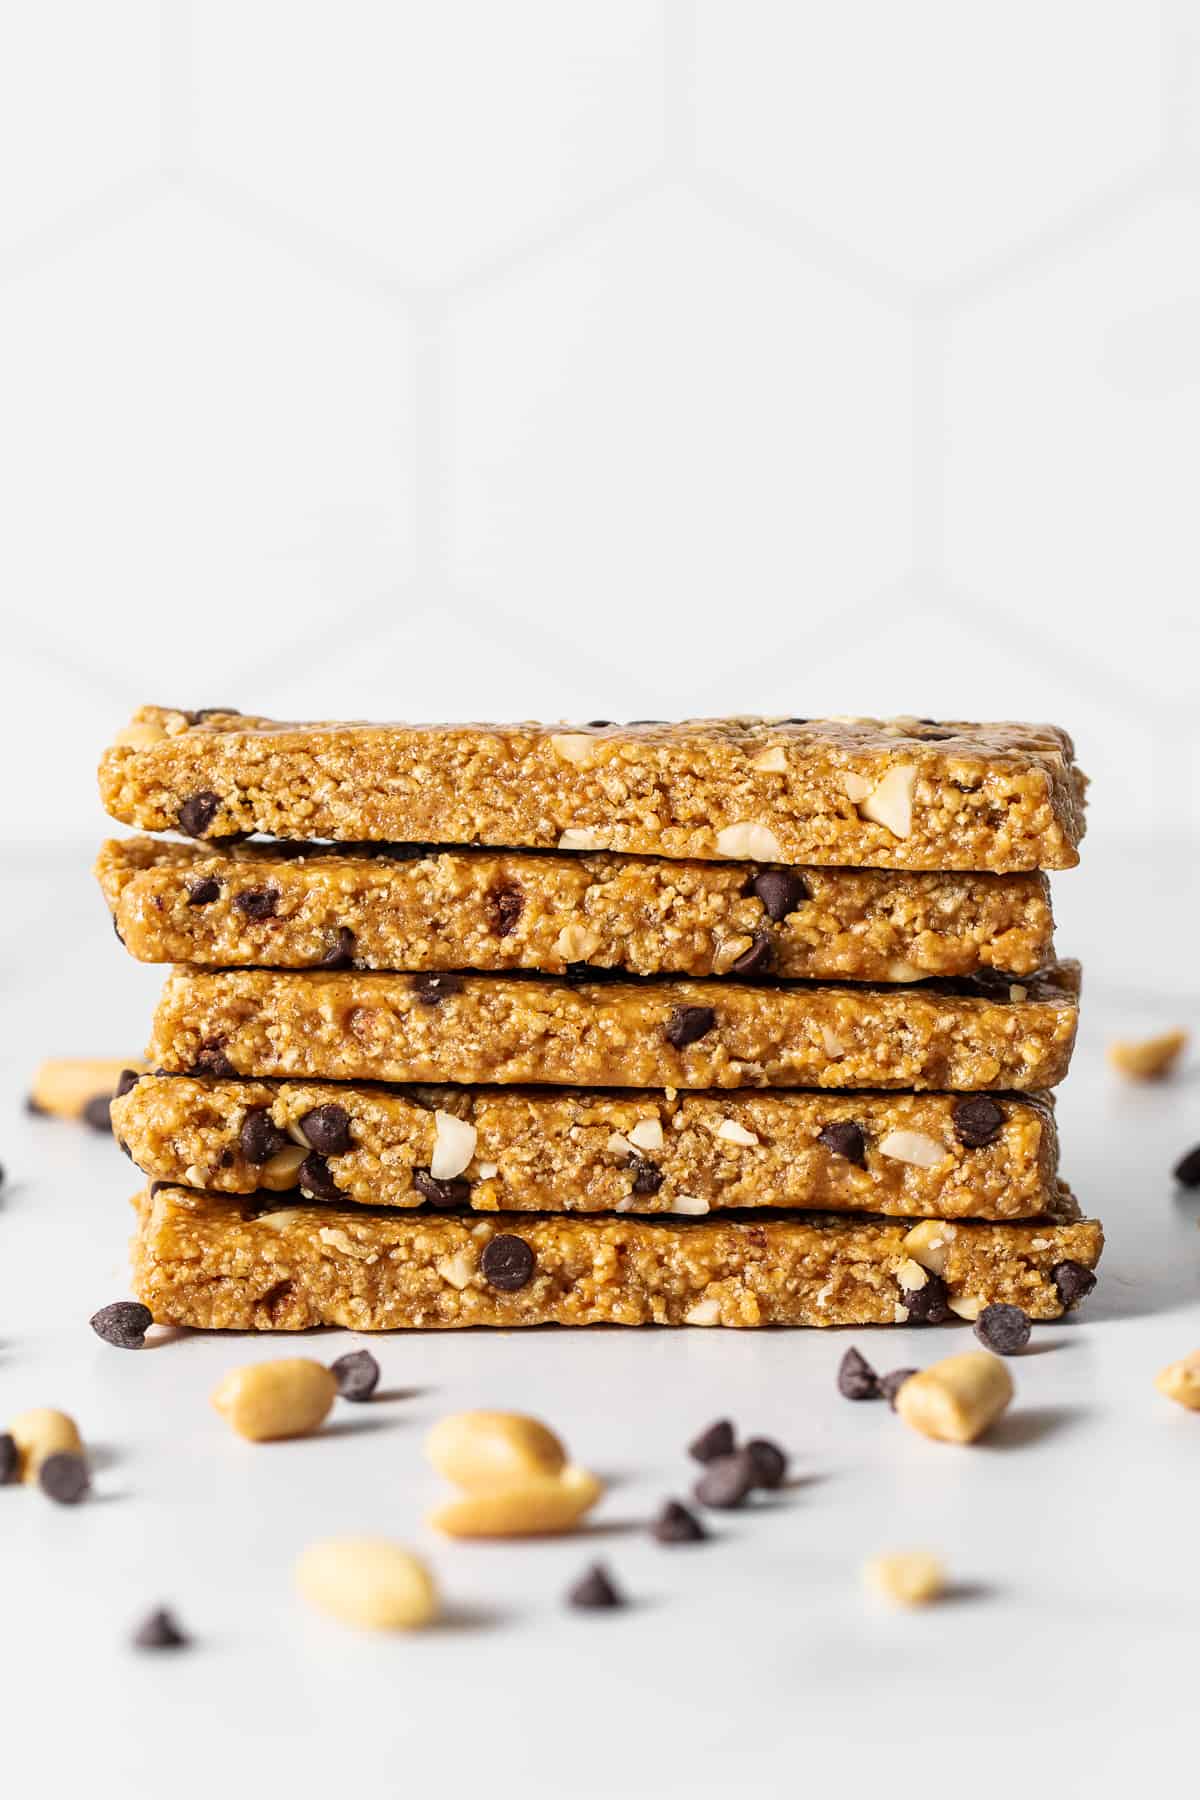
Indulging in a delightful blend of sweetness, saltiness, and texture, these no-bake peanut butter bars offer a nutritious twist on traditional chewy treats. This recipe highlights the beloved pairing of peanut butter and chocolate, achieved through the use of pure, all-natural peanut butter combined with tiny chocolate chips, while Rice Chex cereal provides an surprising element of crispiness. The preparation is incredibly straightforward: just combine all the components, firmly pack them into a baking dish, and allow the freezer to solidify them into perfect bars.
“I prepared these bars for my children’s packed lunches. They sampled one today, and my 10-year-old daughter exclaimed, ‘You are a goddess. I don’t even have words for how delicious these are.’ That’s certainly the highest compliment imaginable!” – Hannah
Key Ingredients for These Delicious Bars
- Rice Chex cereal: This well-loved breakfast staple imparts a delightful crunch to every bite of these peanut butter bars.
- Peanut butter: Opt for a smooth, drippy variety to achieve the ideal texture. For optimal outcomes, choose all-natural creamy options from brands like Smucker’s or Trader Joe’s. Should your peanut butter be too thick, incorporate a couple of teaspoons of melted coconut oil to loosen it up prior to adding it to the recipe.
- Brown rice syrup: This plant-based, low-glycemic sweetener is my go-to choice for creating delectable no-bake desserts.
- Honey: It provides a natural touch of sweetness that enhances the overall flavor profile.
- Peanuts: Roasted and salted peanuts deliver an intense, authentic peanut essence to the bars.
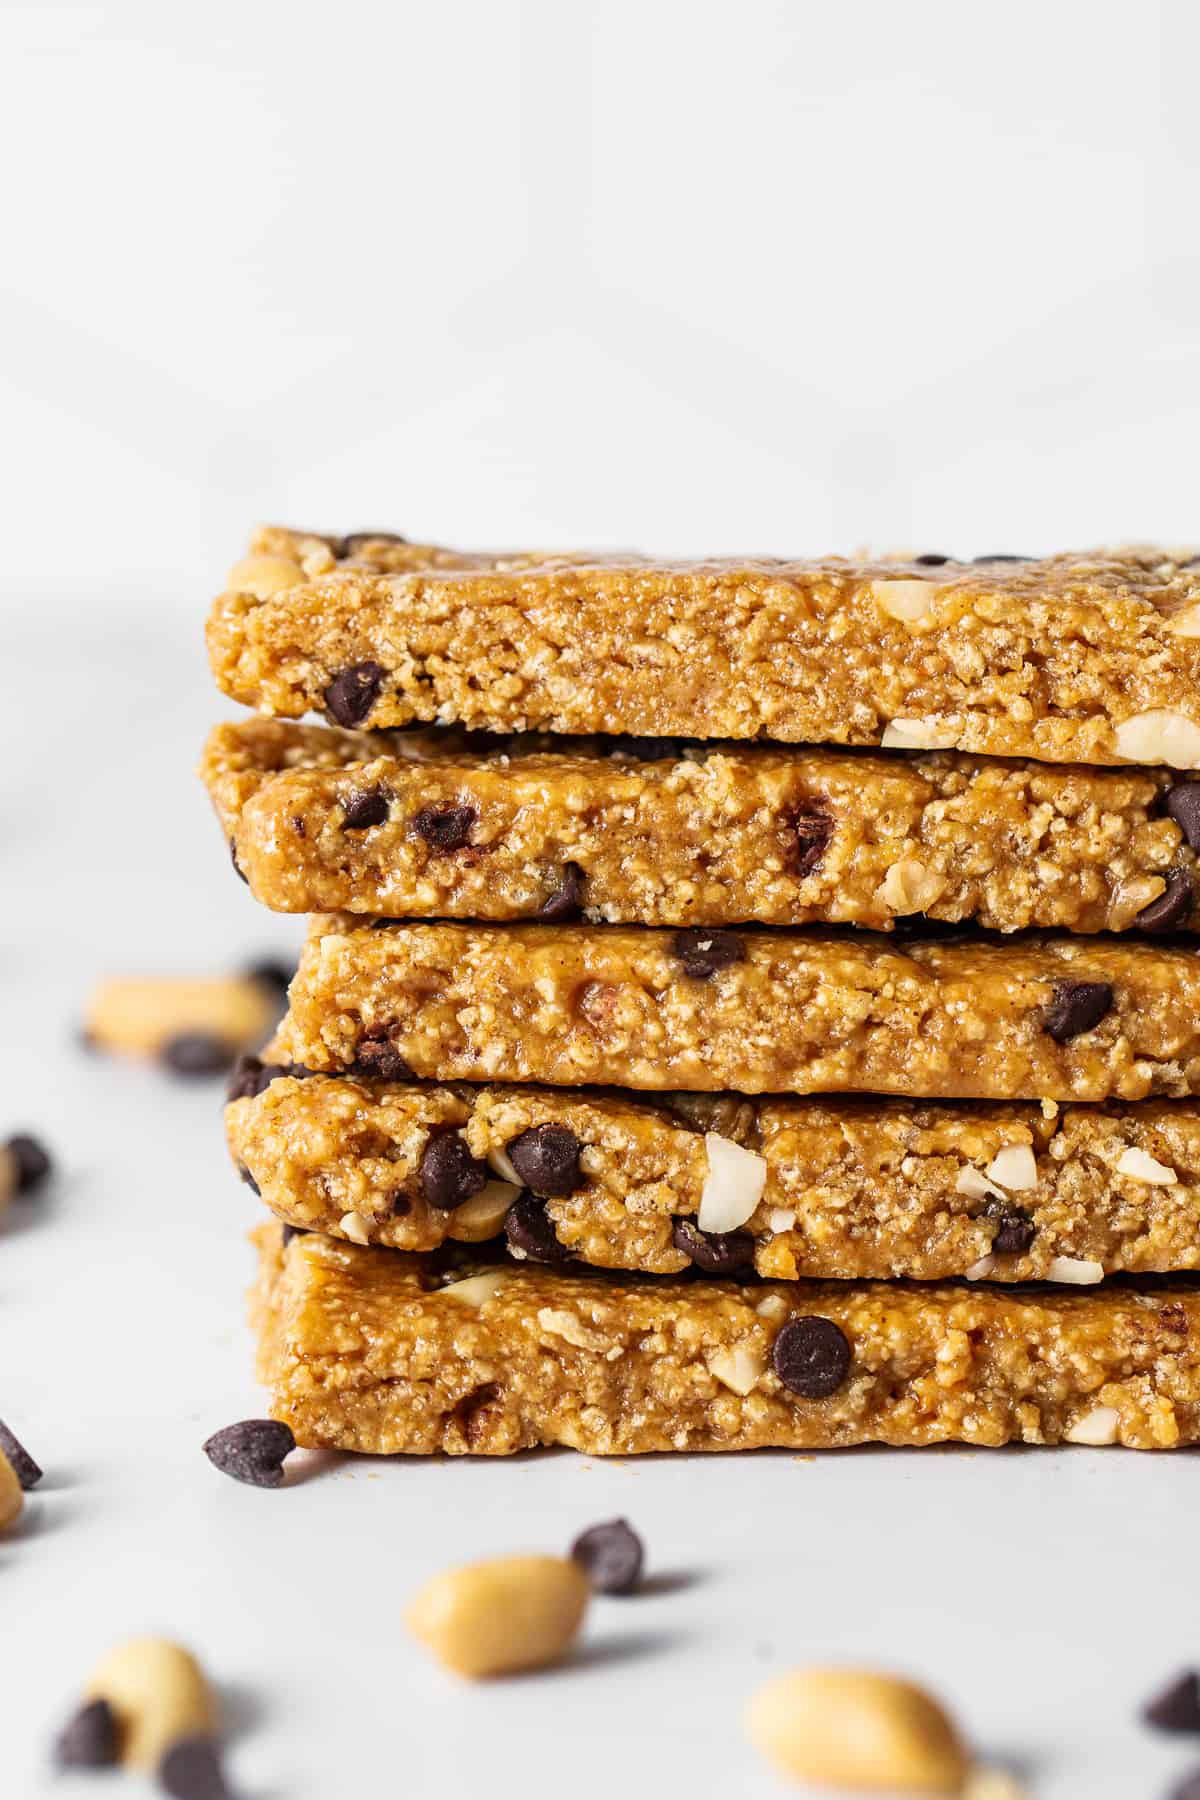
- Mini chocolate chips: These tiny morsels ensure a burst of chocolate in every single piece. They distribute evenly throughout the mixture, though finely chopped chocolate bars serve as an excellent substitute.
- Kosher salt: A pinch brings the ideal harmony between sweet and savory notes.
Helpful Hint: To create nut-free versions of these no-bake bars, substitute sunflower seed butter for the peanut butter. Keep in mind that this change will alter the flavor slightly.
Step-by-Step Guide to Preparing No-Bake Peanut Butter Bars
One batch of this mixture fits beautifully into a standard 9×13-inch casserole dish. Begin by lining the dish with parchment paper, which makes removal effortless once the bars have set.
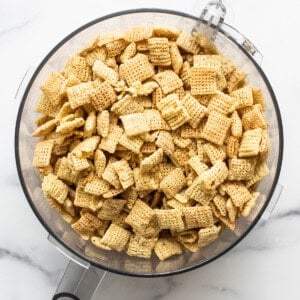
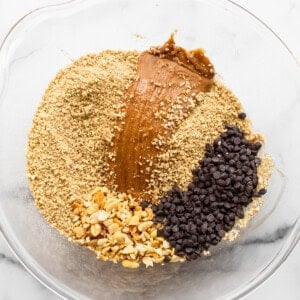
Start by processing the Rice Chex in a food processor until they form small, coarse pieces – aim for a texture akin to coarse crumbs, similar to that used in peanut butter honey Chex balls, rather than a powdery fine grind. Lacking a food processor? Simply place the cereal in a large gallon-sized zip-top bag and crush it manually using your hands or the flat edge of a measuring cup.
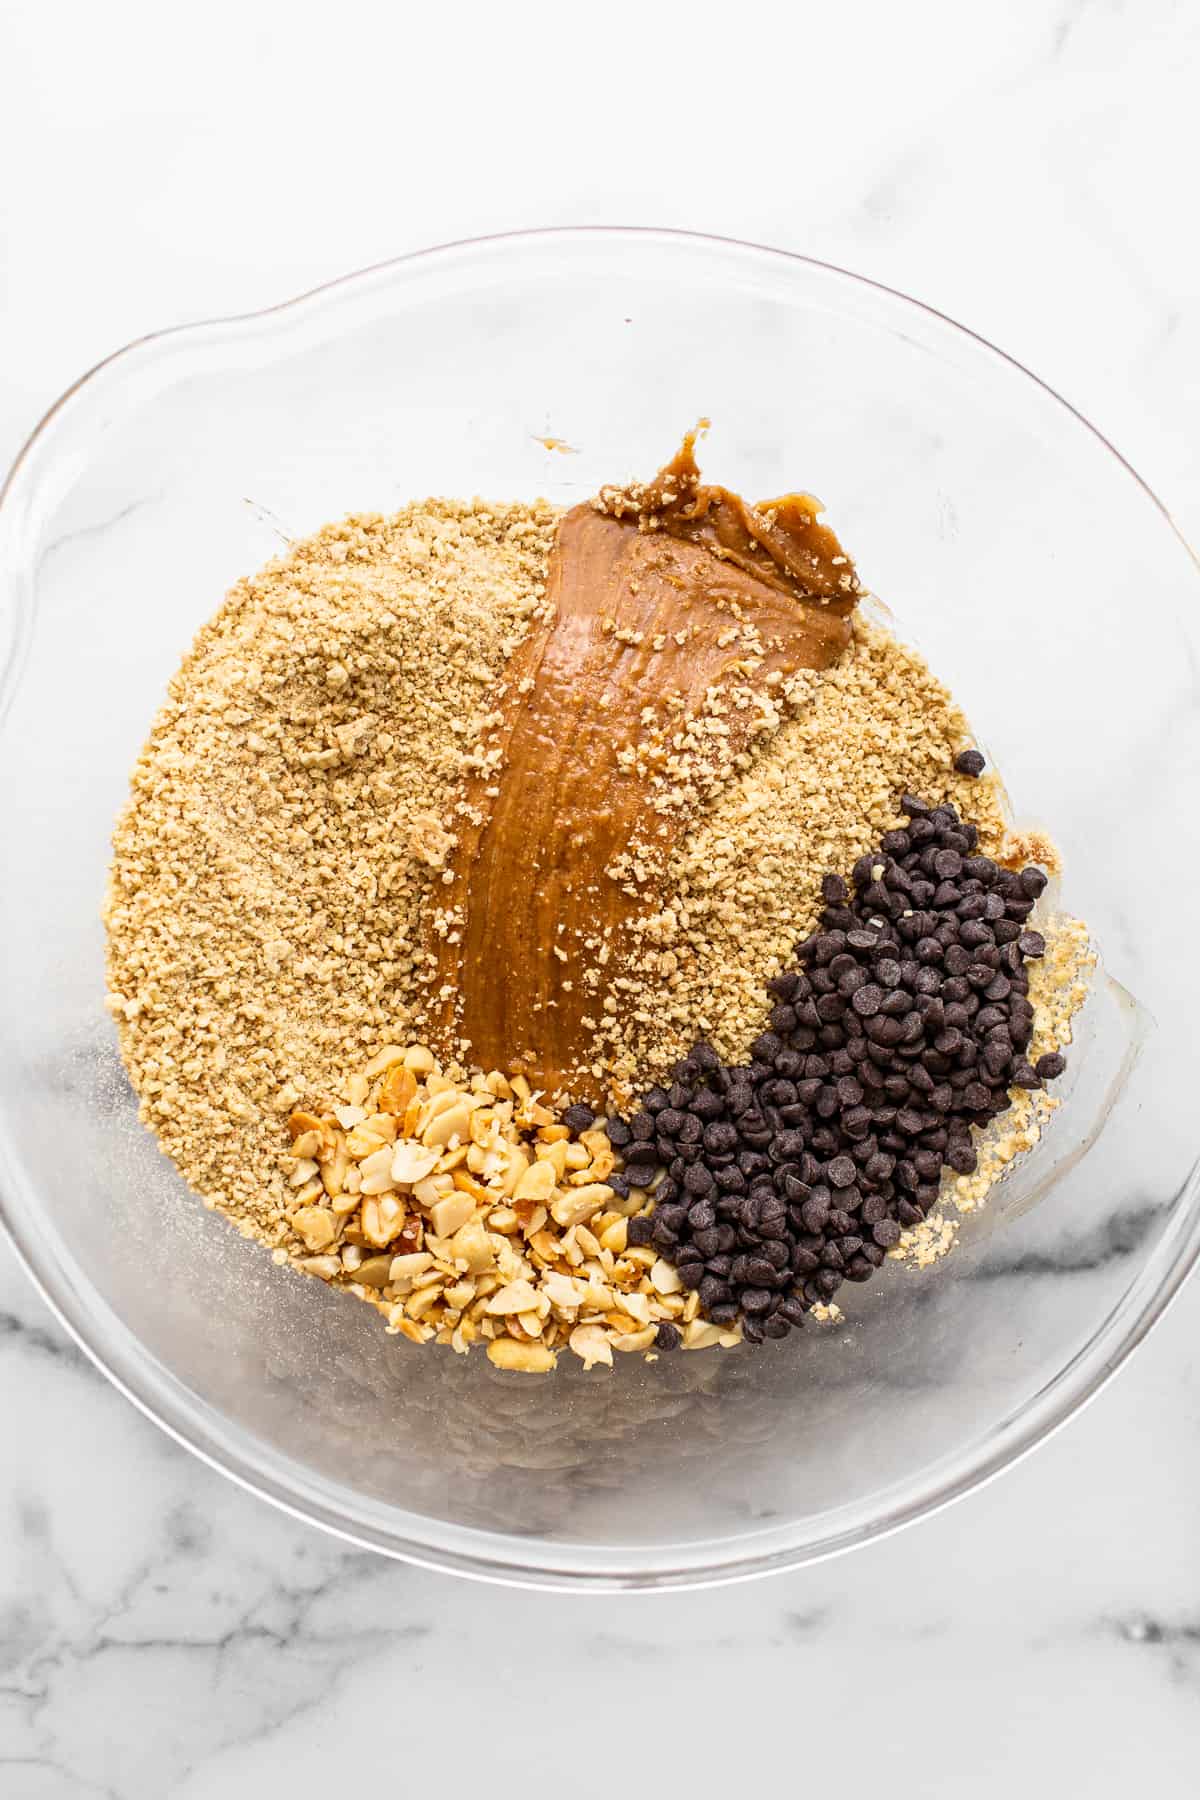
In a spacious mixing bowl, combine the peanut butter, brown rice syrup, and honey. Stir vigorously until they meld into a thick, batter-like consistency that holds together nicely.
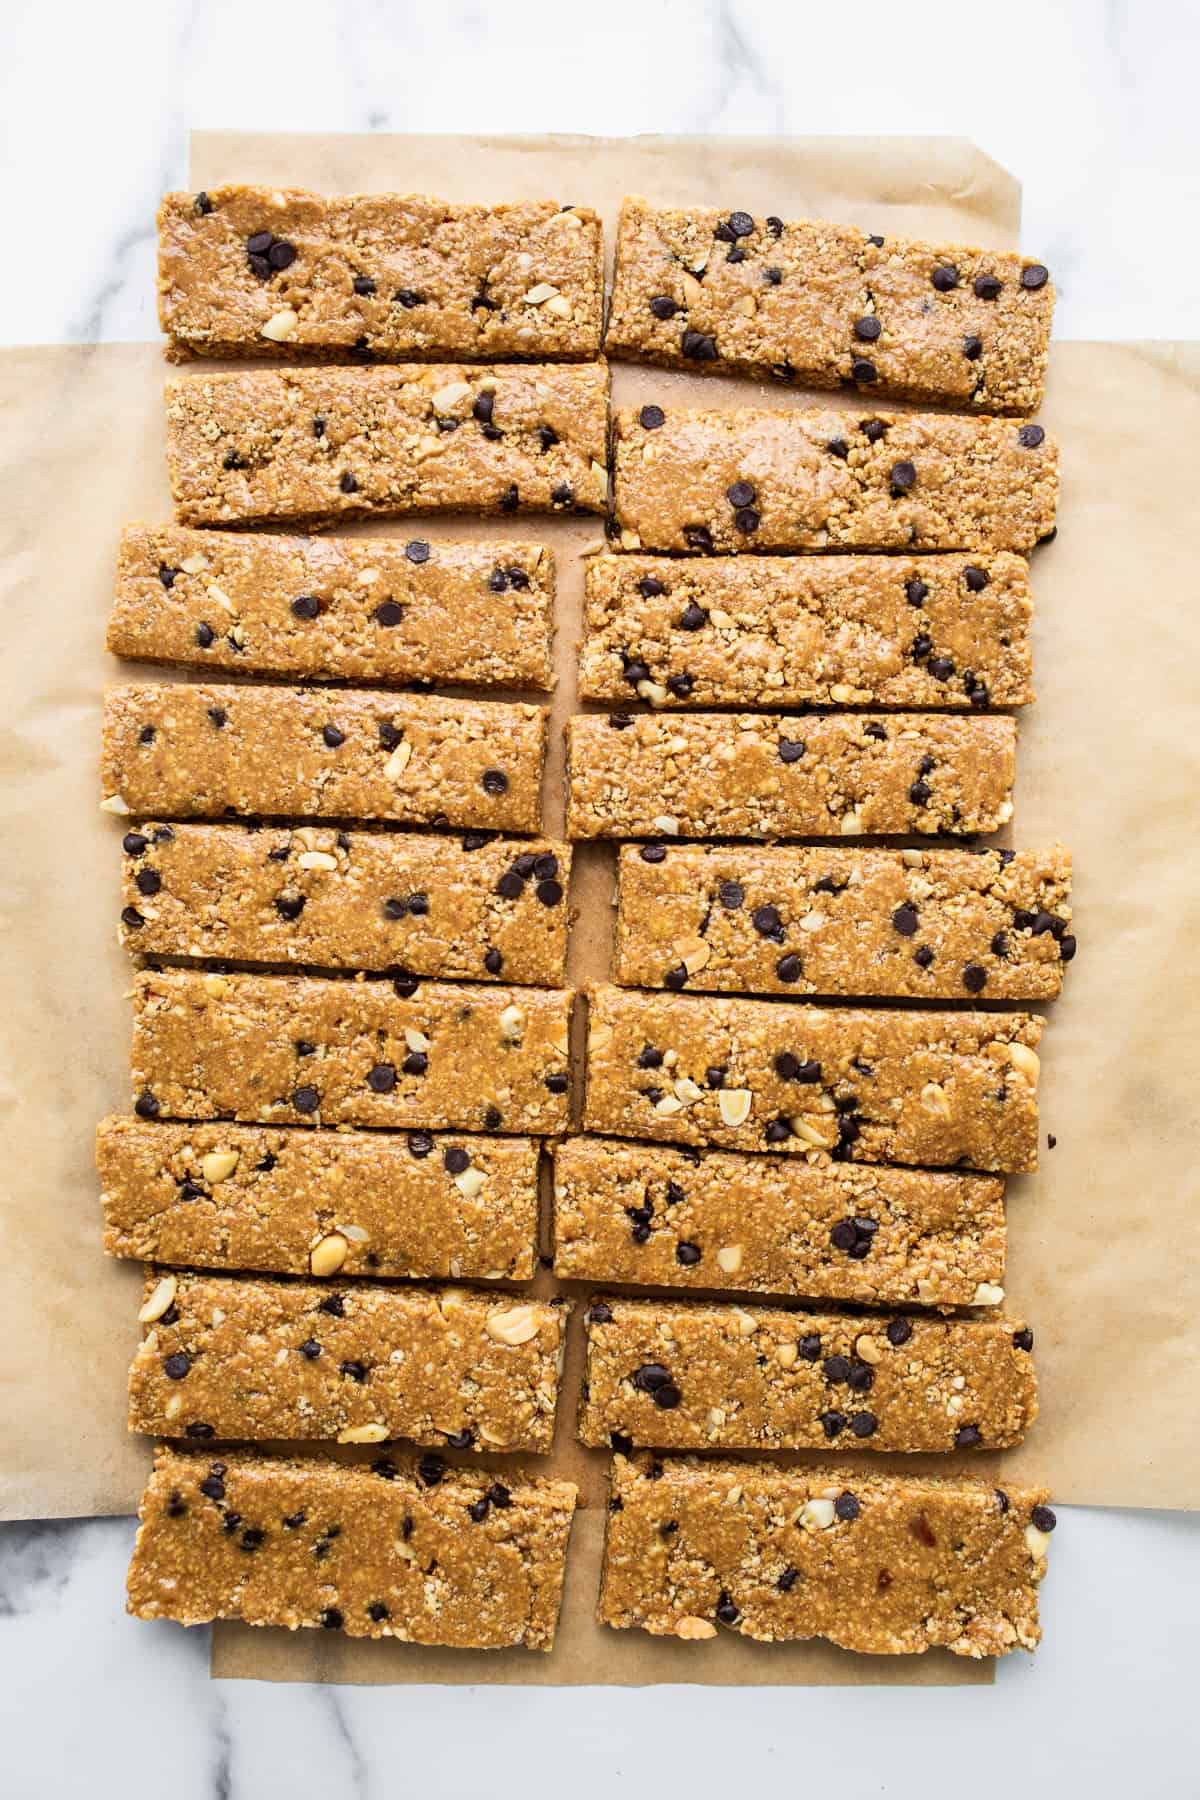
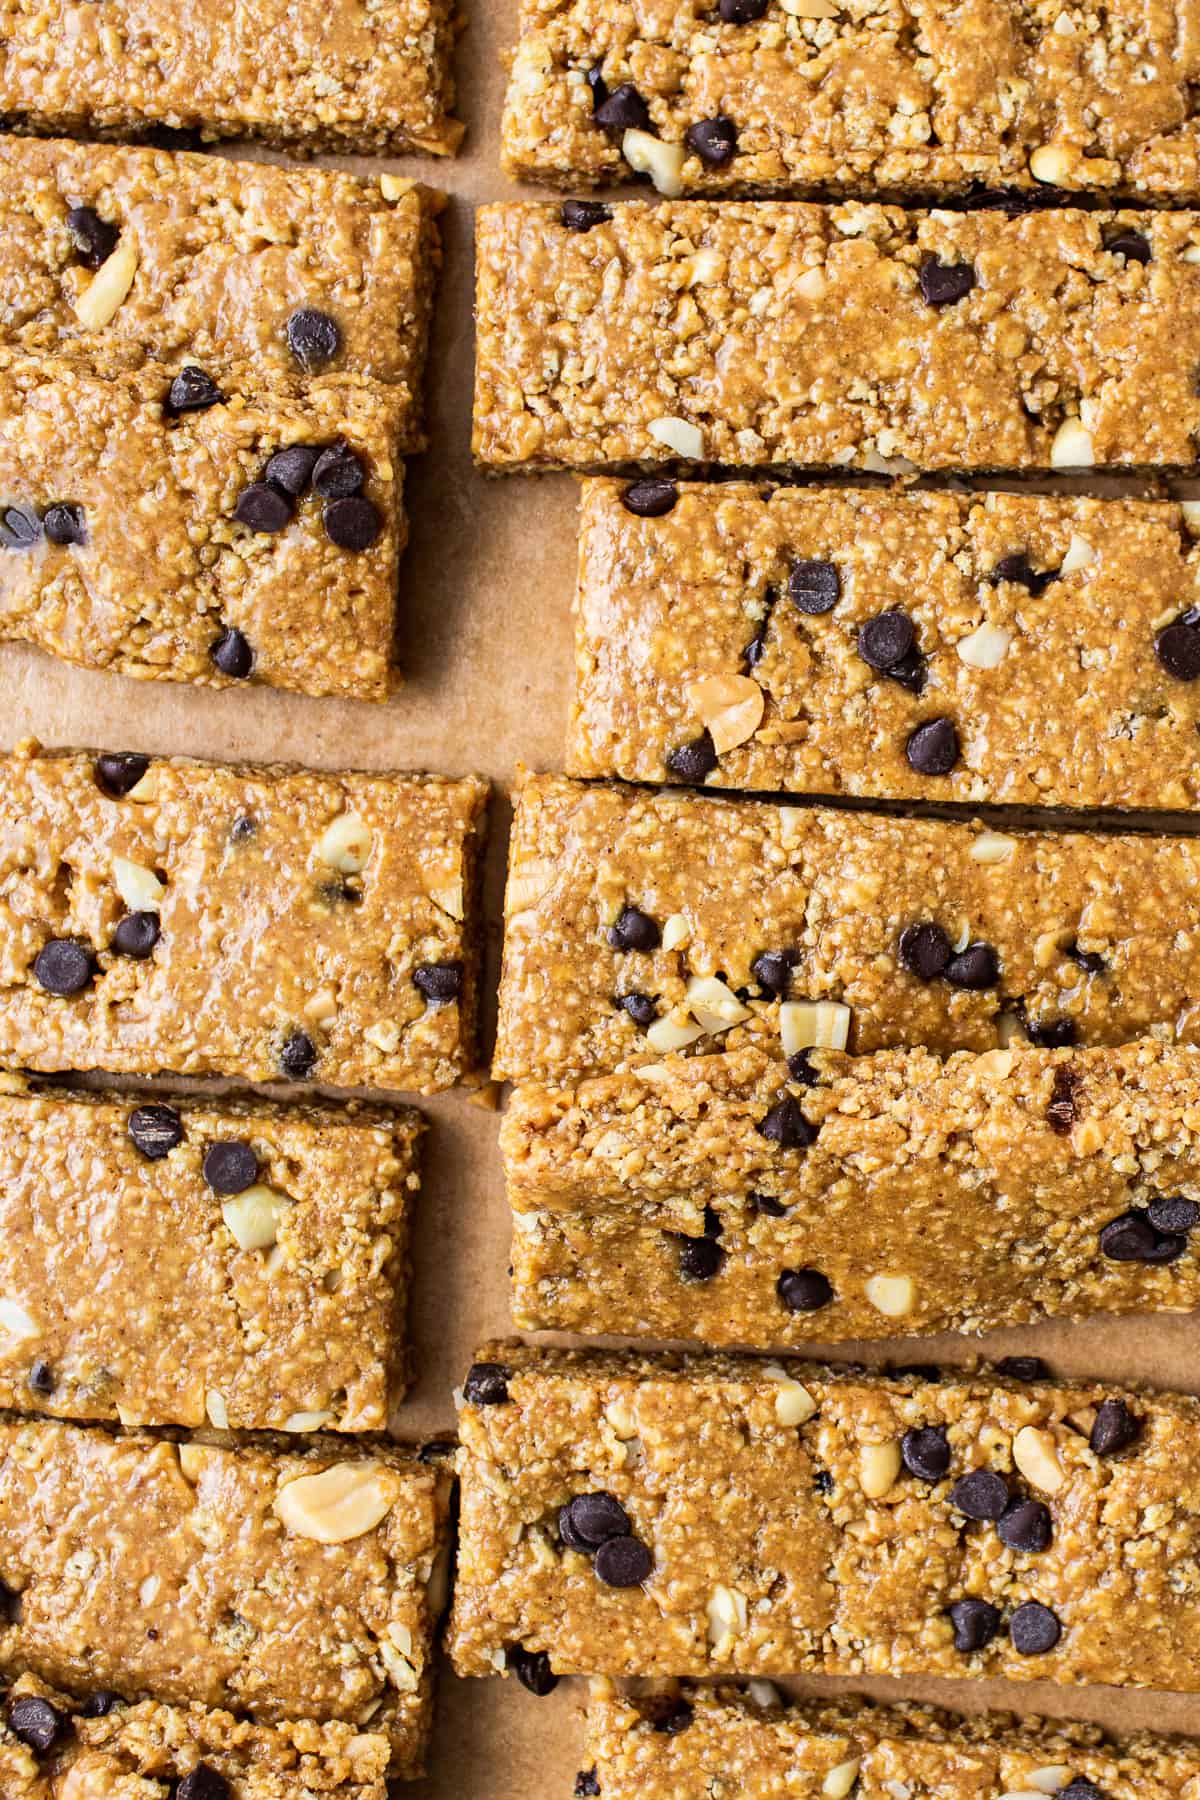
Next, incorporate the crushed Chex pieces, chopped peanuts, and mini chocolate chips into the peanut butter base. Mix thoroughly, ensuring every ingredient is evenly coated and distributed throughout the mixture.
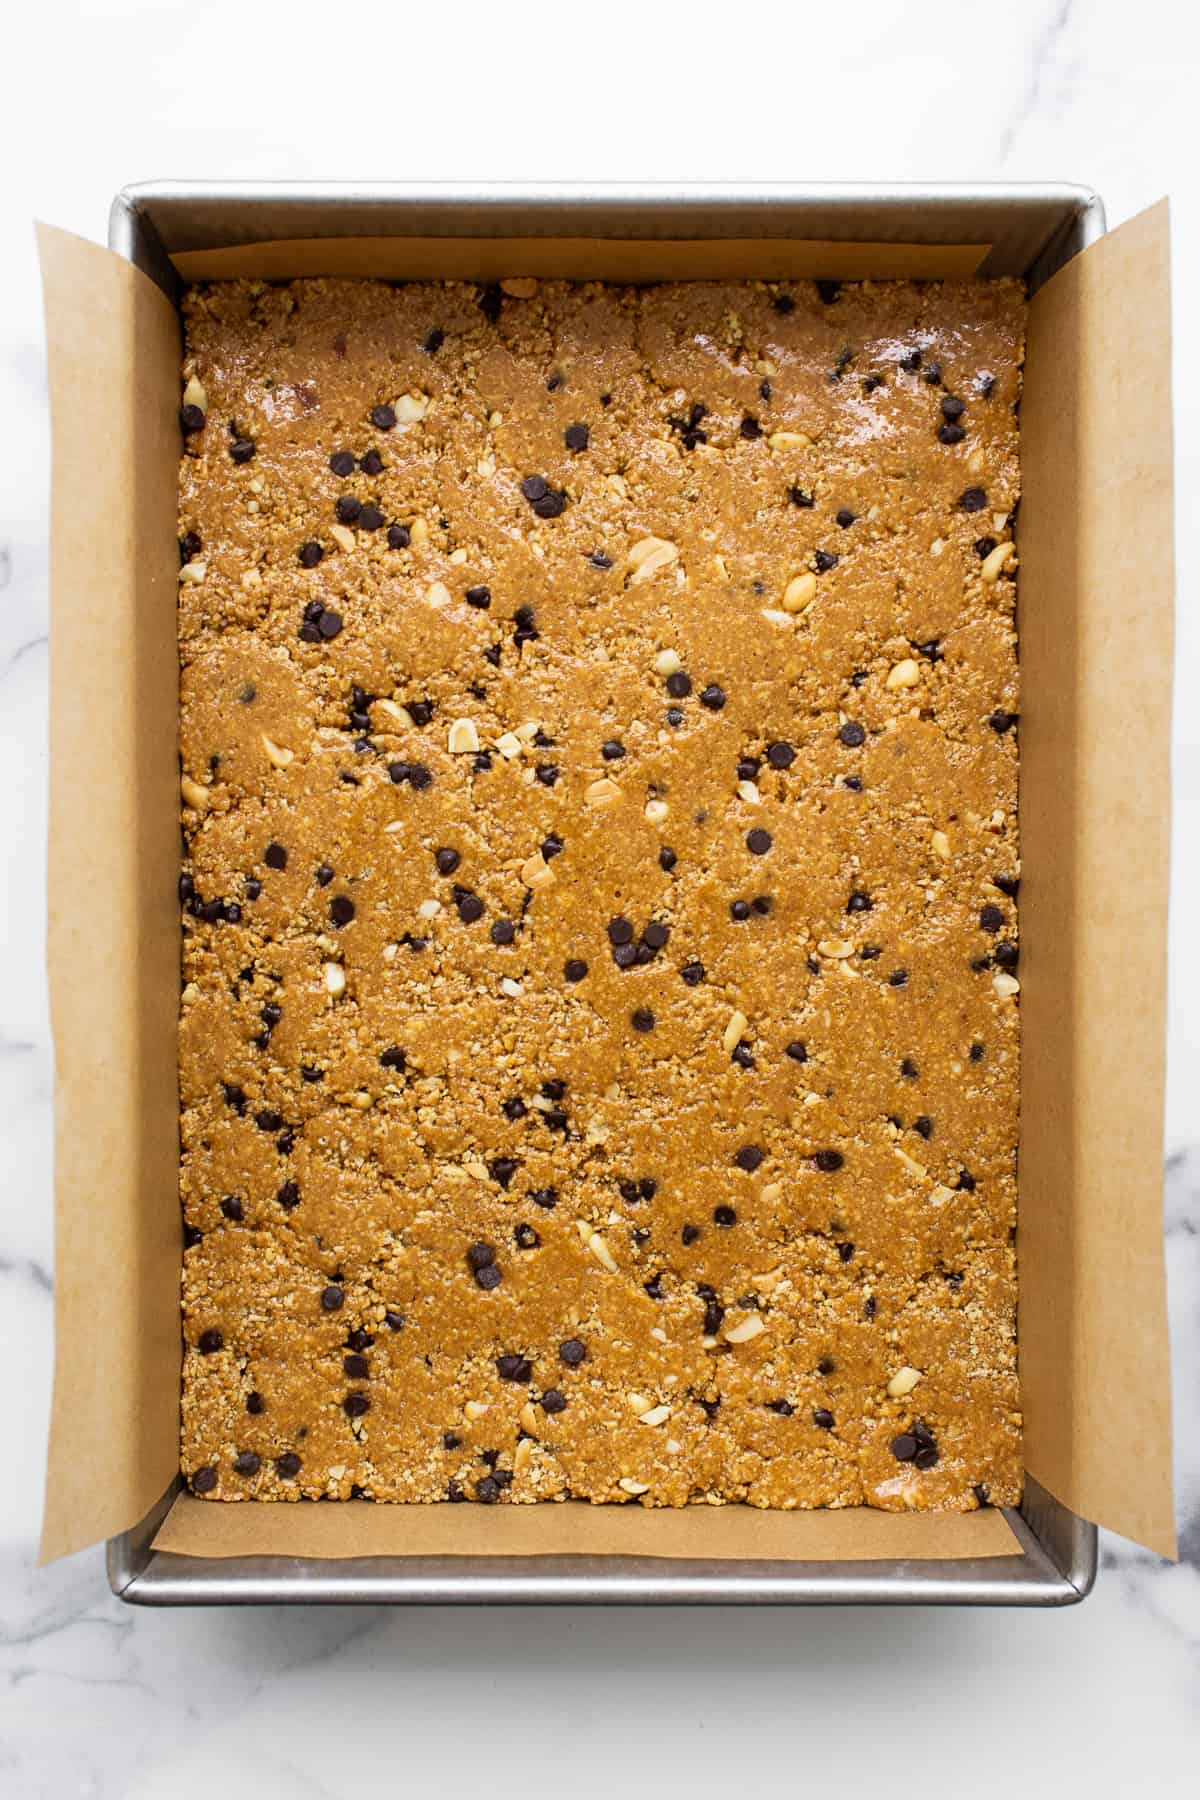
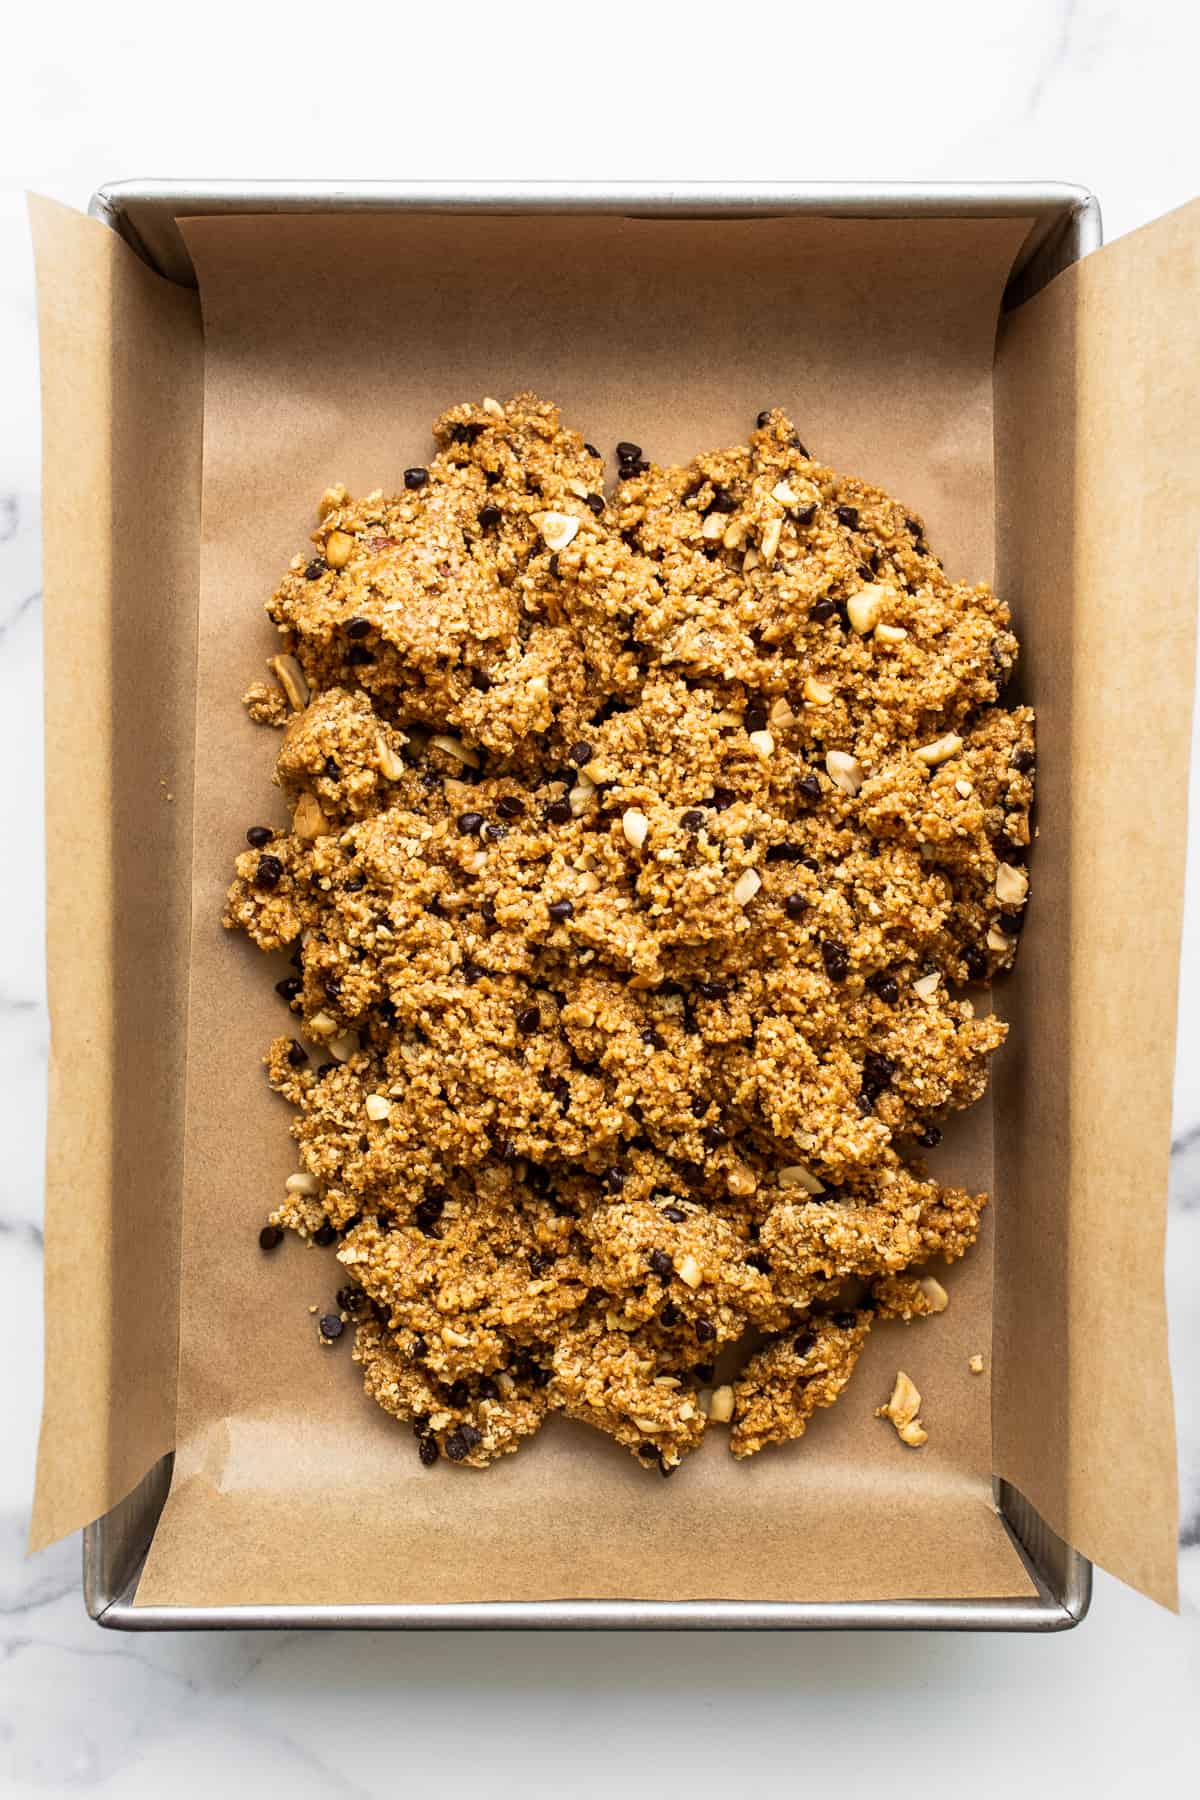
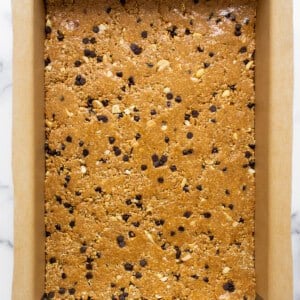
Transfer the entire mixture into your parchment-lined pan. Use clean hands or a spatula to spread it out into a uniform layer across the bottom. Press down firmly and evenly to compact it tightly, preventing any loose or crumbly sections.
Pro Tip: Lightly dampen your hands with water before pressing; this prevents the sticky mixture from adhering to your skin.
Transfer the pan to the freezer and allow the bars to chill and firm up for 1 to 2 hours, depending on your freezer’s efficiency.
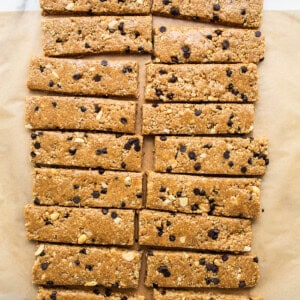
When the bars feel solid to the touch, retrieve the pan from the freezer. Carefully grasp the overhanging edges of the parchment paper to lift the entire slab out of the dish, then transfer it to a expansive cutting board. Employ a sharp knife to slice the bars into squares, elongated rectangles reminiscent of granola bars, or any creative shapes that suit your preference.
Expert Tips for Flawless No-Bake Peanut Butter Bars
Achieving perfection in no-bake treats comes down to a few key practices. Ensure your peanut butter is sufficiently drippy for smooth mixing, crush the cereal to the right coarseness for optimal crunch without overpowering the other flavors, and press the mixture with conviction to create bars that hold their shape during cutting and storage. Patience during the freezing phase is crucial – rushing this step can lead to soft, fragile results.
Creative Ways to Enjoy These Bars
These versatile no-bake peanut butter bars are perfect for a variety of occasions. Slip them into school lunches or work meal preps for a satisfying, portable snack. Keep a few handy for that mid-afternoon energy boost when hunger strikes. They make an excellent addition to holiday dessert trays, impressing guests with their homemade appeal. Alternatively, savor them as a guilt-free after-dinner treat. Remarkably, they freeze exceptionally well, making them ideal for stocking up during snack shortages or busy weeks.
Proper Storage Guidelines for Longevity
For the best taste and texture, store these bars in a chilled environment, whether in the refrigerator or freezer. In an airtight container within the fridge, they maintain freshness for up to 2-3 weeks. To avoid them sticking together, insert sheets of parchment paper between each layer of bars.
For extended preservation, individually wrap each bar in plastic wrap, then nestle them into an airtight container or a freezer-safe zip-top bag. They can be stored this way for as long as 3 months without compromising quality. Simply thaw briefly or enjoy straight from the freezer for instant gratification.
Frequently Asked Questions
Can crunchy peanut butter be used instead?
Absolutely. Substitute the same quantity of crunchy peanut butter for the creamy version. To guarantee a drippy texture suitable for mixing, stir in several teaspoons of coconut oil beforehand.
How long should the bars chill to set properly?
Allow them 1-2 hours in the freezer until they are firm throughout. The exact time may vary based on the thickness of the layer and your appliance’s temperature.
Complete Ingredient List
- 6 cups Rice Chex cereal
- 1 cup drippy peanut butter*
- ½ cup brown rice syrup
- ½ cup honey
- ⅓ cup chopped peanuts, roasted and salted
- ⅓ cup mini chocolate chips
- ½ teaspoon kosher salt
*Peanut butter note: Select a drippy, natural creamy peanut butter such as Smucker’s or Trader Joe’s for superior results. If it’s not drippy enough, blend in a few teaspoons of melted coconut oil prior to use.
Detailed Instructions
- Prepare a 9×13-inch casserole dish by lining it with parchment paper and setting it aside.
- Place the Rice Chex into a food processor and pulse repeatedly until broken into small, irregular pieces. Without a food processor, seal the cereal in a gallon-sized bag and crush by hand or with a rolling pin.
- In a large bowl, whisk together the peanut butter, brown rice syrup, and honey until fully blended and smooth.
- Add the crushed Chex, peanuts, and chocolate chips to the wet mixture, stirring comprehensively until every element is enveloped in the peanut butter blend.
- Spoon the combined mixture into the prepared dish. Spread it evenly using a spatula or your hands, pressing down assertively to form a dense, uniform layer. Wet hands can help manage stickiness.
- Freeze the dish for 1-2 hours until the bars are solidly set.
- Remove from the freezer once firm.
- Leverage the parchment overhang to lift the bars onto a cutting board.
- Slice into desired shapes with a sharp knife.
- Refrigerate in an airtight container for 2-3 weeks, using parchment separators. For freezing, wrap individually and store up to 3 months.
Additional Notes:
- Peanut butter: Prioritize drippy varieties; add coconut oil if needed.
- Nut-free option: Sunflower seed butter works, but expect a flavor shift.
Nutrition (per serving): Calories: 205 kcal, Carbohydrates: 28 g, Protein: 5 g, Fat: 10 g, Fiber: 1 g, Sugar: 18 g
Nutritional values are estimated and may vary based on specific ingredients and portion sizes.